Wednesday, December 21, 2011

Something Festive!

A couple months ago my cousin sent me this link:http://www.blogher.com/customizable-fabric-scrap-wreath and I was inspired to make a Christmassy version!

I got a metal frame at Michaels for about $5 and then went to Fabricland where all the holiday cottons were on sale in the month of November. I choose 11 designs and had them cut the minimum amount - 4inches - of each. That only cost about $7 - so for only $12 I had my supplies ready to go. 

All I had to do was cut the strips and tie them on to the frame - which sounds easy - but took about 3 hours! Thankfully I just put on some good tv and got it done :) 

I've noticed since there are lots of blogs where people used a metal coat hanger, which you could also do but I really liked the depth the store bought metal frame added.

Oh and the moose in the centre was also from Michaels - part of a felt garland that I cut apart and made into some ornaments.

Tuesday, December 20, 2011

Apple & Pumpkin Butter


Inspired by the load of apples I had from apple picking at Thanksgiving, I decided to try out making some apple butter. Using this recipe:
http://www.mybakingaddiction.com/crock-pot-slow-cooker-apple-butter-recipe/ I put it in the slow cooker over night, and it couldn't have been easier. I was then inspired to try some other flavors so tried out this one http://www.skinnytaste.com/2010/10/pumpkin-butter.html 
(this is also my new favourite food blog btw).

Both are super yummy!

What do you do with apple or pumpkin butter you ask?

Well, you can put it in cute little jars like I did and give them to your friend for their birthday :)
Or, if you want to eat it all yourself - you can spoon it into your oatmeal, mix it with plain yogurt, put it on toast or a cracker, spread the apple butter on brie and bake it with almonds for a delicious appetizer....or any other creative ideas you can come up with. It's so tasty you'll want to find all the ways you can to use it up!

I recently did another batch of the apple butter, and because I wanted to give it as Christmas gifts, I boiled it as you would when canning things - so that it will preserve longer.

Try it out, you will not be disappointed!

Monday, November 7, 2011

Jersey Knit Bracelet

Finally - a project that is NOT a baby blanket. Although I did work on a couple more blankets this weekend,  I though it was time for something different. I have a few new favourite blogs I follow recently, and for crafts I am just in love with V and Co. I just love her ideas, and can promise this won't be the only thing you seem me make from her site!

Following her tutorial, I made a few of these Jersey Knit Bracelets this weekend.
These are not the best photos, but you'll get the idea.


I used some of the t-shirts I had leftover from my t-shirt necklaces.

Not sure I'll wear these any time soon as I think a chunky bracelet like this is more suited for summer....but I had a lot of fun trying it out :) 

Thursday, November 3, 2011

Blankets with Baby's Initials!

Well, people warned when I started this blog that it might be hard to keep up with when the excitment wore off...but the reality is that other things have occupied my time lately, and I just haven't beend doing as much crafting as I might like. However, I did find some time this fall to catch up on all the 2011 babies I hadn't had a chance to make anything for yet...and with that came the innovation of baby blankets with initials! Inspired by my friend Ian's twins I tried this out...and loved it. It is the same as other baby blanket variations you've seen on here (the taggy or rag edge blanky) except with the lil' babe's initials!

 Here are some of my more recent ones:


I hope to be back soon with some of my cooking adventures...stay tuned!

Wednesday, November 2, 2011

Crafts in Action: Camden SwamiNathan

I am long overdue on an update...and have been making lots of cute baby blankets lately - finally catching up to all the 2011 babies! Here's a sneak peak of a recent one - Camden SwamiNathan!

Tuesday, July 5, 2011

Cascading Colours

I have a bit of a crafting rule I've been trying to hold myself to: when I'm working on one craft of a certain type, I should finish that craft before starting a new project. So....if knitting something, I should finish that knit project before a new one. However, if I want to take a break from my knitting to sew, that's okay. But, last week I was just feeling very tired of a blanket I've been knitting since November. I've avoided knitting because of this rule and my lack of motivation on this project. This blanket I've been knitting for so long will be wonderful when it's complete (stay tuned) but I just needed a break, so broke my rule. I was desperate for a project that wouldn't require me to think too hard or follow a pattern line by line. I wanted a project that would come together quickly and give me some feeling of accomplishment. And then I remembered that I had leftover yarn from a blanket I made for my sister two years ago before my niece was born. I figured it was okay to stretch my rule since at least I was not spending money on new supplies. 

The pattern I used was a free Lion Brand one - Cascading Colours Baby Blankie. I fell in love with the colours of this pattern when trying to decide what to make my sister and purchased the kit from their site. Luckily there was enough yarn to make a whole second blanket:


I'm not sure just yet what I'll do with this blanket, but it was just the project I wanted - I was done it in about 4 days!
 And some photos of my adorable niece as a baby using this blanket:

 
And my mom getting a cuddle:

I even had enough yarn left to make a few granny squares. When I remember, I try to make a granny square or two from my leftovers in hopes of one day having a blanket made of all these bits from various projects. 

Wednesday, June 29, 2011

Made myself a dress

I had booked the 3 days before my wedding off work because it just seemed like a good idea. Then the days off arrived, and shockingly I was ready for the wedding. I am not sure I'd ever been so organized in my entire life. I decided I needed a craft to keep myself busy!  I had seen this tutorial a few weeks before and loved the idea of combining a tank top and some fabric to make a summer dress. I figured not only would it be an easy project to try out, if it worked out I'd also have a fun new dress to wear on my honeymoon.

I used a Joe Fresh tank top that cost $6 and I think the fabric was about $6 also with my Fabricland membership.  And it all worked out just great:


Unfortunately I'm all squinty faced with the sun in my eyes -but this tree in our yard only blooms for about 4 or 5 days a year, so I thought I better take advantage of the photo opp!

For those of you interested in the sewing details - the tutorial is easy to follow. It took me a few (3!) tries to get the length of the tank top and the fabric to look the way I wanted it. And I was also a bit fussy about properly distributing the gathered stitches - I wanted it to look even. In this photo you may not be able to tell I am wearing a black belt with it - the tutorial suggests using the patterned fabric to make a belt but I thought it would be easier to make the "belt" portion out of the bottom of the tank top. I did not attach it to the dress, just pull it on over top when I wear it. You could also wear with a store-bought wide belt - and that might give the dress a more polished look.   Although the length of the dress looks okay here, I find it a bit short for sitting/bending over so have started wearing tights/leggins with it since this photo was taken. 

Not bad for my first time sewing an actual article of clothing for myself!

Tuesday, June 28, 2011

Wedding Crafts

My motto when planning our wedding was to keep it simple, but as a crafty person I knew the day would have to have some personal touches. I didn't end up making too much for the wedding but we certainly had some bits of DIY craftynesss.

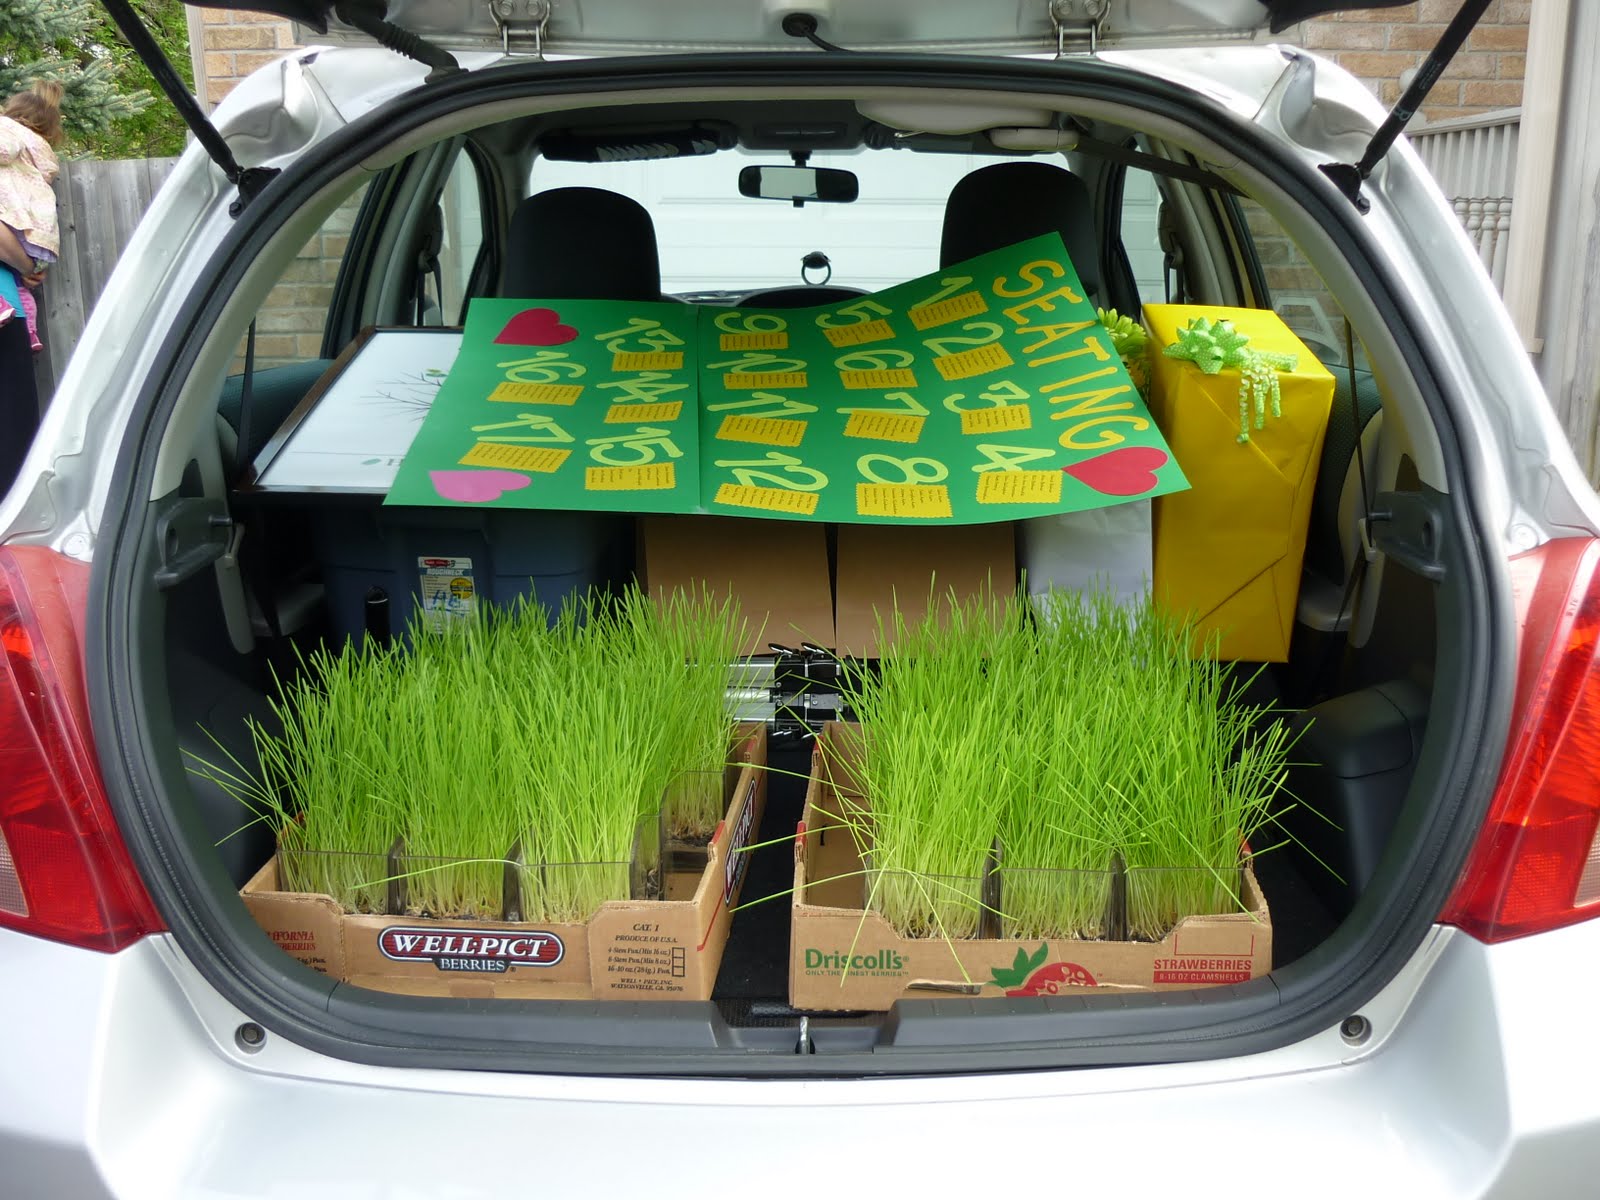
First up - we grew wheatgrass for our centre pieces. My husband gets all the credit for this - he did many tests in the months leading up to the wedding. (You can even see a blurry version of him in the background here!)


They sure looked fun packed into the back of my wee car:


Next - the die cutter at work got some serious attention from me in the weeks leading up to the wedding. I'd bring my paper and spend lunch hours cutting out letters. Then get home and realize I missed one letter and have to go back the next day!

  I made a series of directional signs for guests:
A sign for our DIY photobooth:
(Amanda is a great model)

I made this "Just Married" sign:
I also used the die cutter for our seating chart but can't find a photo of it just now.

My very favourite craft of the whole wedding was a "Just Married" bunting that was displayed behind Dave & I at our "Sweetheart Table" at the reception:
 (with another shout out to Candy by Katie here!)

I had just envisioned this in my head, and made it (with lots of help from my dear friend Amy) with no real idea of where or how we'd used it on the day. Any of you who follow this blog will know it is very similar to the Happy Birthday Banner - the 'Just Married' one was the original bunting - but I kept it top secret until the wedding!  I was just thrilled when it worked out that it looked so perfect on this screen behind us!

Those are all the crafts that I can take credit for but I used the expertise of some other crafty people and think they deserve a shout out. You've already heard about Candy by Katie - but here are the others.

Our invites and a graphic for the ceremony program were done by LovliDay from etsy. I just love her work and was so impressed with the speed and quality of everything I purchased from her. In addition, one of my other favourite things was our guest book. Another one of LovliDay's products - the Wedding Tree. (click the link, you won't regret it)

My next shout out goes to my wonderful mother who made the dessert. Our reception was lunch/brunch time and I really wanted carrot cake cupcakes. Taking this task seriously, my mom created samples with multiple recipes and icing types - taste testing those was so fun. We chose our favourite and here's a photo of them as we were icing them the day before the wedding:
(the caterer garnished with a strawberry on top and berries on the plate - yum!)

Needless to say we had lots of fun icing them:

You may have also noticed a heart shaped cake in those photos. We had decided to do the traditional cake cutting and so asked my mom if she could also make a heart shaped carrot cake. Not only did she do that - she truly made a beautiful wedding cake (would you even know she'd never made one before?):
Thank you mom!

I think those are all the bits of crafty brilliance to share - but I need to also give a special shout out to our photographer as his talents have given us the most beautiful memories of a day we never want to forget! (and he deserves credit for some of the photos above!) Check out his work: http://www.NikPix.ca or http://www.facebook.com/NikPix.ca - if you 'like' him on facebook you can check out more photos of the big day!


Monday, June 27, 2011

Crafts in Action

The wee babes I made these blankets for are sure growing fast! 

Baby Elizabeth is 5 months old now and enjoying summertime in Ottawa.


And Cale is 6 months!  Happy lil' guy!


I just love seeing my crafts in action - brings a huge smile to my face!

Saturday, June 25, 2011

Candy with Katie


Katie and I have known each other since we were 5 years old. We went to school together until grade 2 when my parents moved to the big city. We were childhood pen pals and March break visiting friends until University when we decided to be roommates. Through many hilarious times together we have kept the friendship going and this spring embarked on one of the funnest things we'd ever done together!

Katie has started an incredible candy company. Check it out - but a word of warning - you might drool. http://www.candybykatie.com/

Shortly after I got engaged Katie called me up with a hugely generous offers - she wanted to do our wedding favors and have us be Candy by Katie's first wedding. What an honour. I was so excited to see what my creative friend had in store and I knew whatever she had would be such a special addition to my wedding day. Katie brought many samples to show me but I just fell in love with the chocolate lollipops - there was no question this is what we had to have!

 And then I got to thinking that I'm crafty - wouldn't it be fun if I could help make them? Which brings us to
"Chocolate Day"! I joined Katie in her kitchen and we got to work. Katie had the chocolate moulds all ready to go so we got to make the fondant topping to each lollipop. As Katie says "fondant is like play dough for kids" - so much fun. We rolled and cookie cut and added embellisments. I jumped right in and was so thrilled when my first lollipop was ready:


I cannot express in just these few words how creative Katie is. She had great ideas for 10 unique lollipops so each person at the table would get a different one. While our wedding colours were green and yellow, we decided that a colourful spread would be more cheerful at the wedding.  I just fell in love with the designs and colours.


(okay I know that's only 9 - one is missing!)

We kept on going, and pretty soon had a good majority of them done before we ran out of time for that day.


Check out the real brains behind this - not only is she candy maker extraordinaire - she has some super photography skills!


In addition to how gorgeous and tasty these lollipops are, I was really excited with Katie's idea to double these as a guide to help people know where to sit. Katie took this on and worked tirelessly to make it just perfect for me. Check out the final product.


What an absolutely stunning display.


Thank you Katie - not only for this special addition to my wedding day but also the amazing memories while making them!


Where have I been?

I think I've got a few good excuses for being away from the blog - since my last post I got a new job, got married, and my new husband had surgery (everything's okay). So my time has been consumed with with all of that - but it's time to get back into it and I have a few exciting crafts to share.

I'll slowly work on getting the posts up - but in the meantime here are a few little things I've done but not posted.

This little square was for a quilt that my friend Tracy's sister was putting together for her baby shower.


This is another clutch purse - made for Amy's birthday!


I'll be back soon with my wedding crafts and even a dress I made!

Sunday, March 13, 2011

My crafts in action!

Babies in Blankets!
Colby & Shelby in Edmonton, AB
Born February 21, 2011

Friday, March 11, 2011

Anthropology Knock Off Necklace

One of my very favourite craft blogs is Sew Much Ado and my very favourite part is the We Did it Wednesday link party where everyone posts what they made! I get many of my ideas from this link party. On Wednesday this necklace was highlighted and I knew I had to try it out - a different kind of craft for me to do.

If you ever did Boondoggle (see below) as a kid at camp (or in my case, day care) ...you could easily do this project! 


See - it's very similar. 


The tutorial on Yellow Blackbird is very easy to follow - I think the ribbon used in that one may have been better than my choice. A ribbed ribbon would be less slippery and make for a more unified looking accordion.

What I cannot get over is Anthropology's price tag on this necklace!! I think this necklace cost me max $15 to make! 

I'm not sure it goes with every outfit as Yellow Blackbird's author claims...I felt I needed to dress in a plain outfit so the necklace would be the attention seeking piece....but I know many others could rock this on a daily basis! 

Sunday, February 27, 2011

Happy Birthday Banner

Inspired by this posting I had to make one of these.

A few of my modifications: 
- letters on an angle - I thought this would be more forgiving of my imperfections AND look fun!
- I sewed the letters on before sewing the triangles together (no need to worry about colour of bobbin seemed easier to me!)
- I did a balloon in the middle instead of a cupcake, which I may regret now as I think it looks like a wierd dot in this one. We'll see - I may still have to modify this one as I'm not thrilled with that.

This one is for Amy (Krya's mom for all you followers). With 2 kids and a love for decorating, I know she'll put it to great use!

Friday, February 25, 2011

Kyra's Tutu

Any avid followers of my blog may remember this post about the hat I made for baby Kyra when she was born in September.

And before we move on to the latest craft for Kyra - it's worth seeing how absolutely adorable she is in that hat!!

Amy told me she wanted to make Kyra a tutu and we planned a sleepover craft night to get the job done! Amy & her husband are alumni of Wilfred Laurier University and have the most school spirit of anyone I know - they even had a purple & gold wedding to show their pride! So we of course had to make Kyra a purple and gold tutu.

Using this easy to follow tutorial we were able to make the tutu in about 15 minutes :)

For once I was not doing crafts alone so Amy could get an action shot - proof that I really do all these crafts :)


It was bedtime for Kyra so we could not try the tutu on right away but I think she sure thought it was fun to play with.


And Amy got some incredible photos the following day - what an adorable baby!!


Thanks Amy for a great craft night - we also did some great crafting for my wedding...but that will have to stay secret a bit longer ;)