Sunday, October 31, 2010

Baby blankets, baby blankets & more baby blankets!

It seems that everytime I turn around another friend or family member is expecting a little one...and while I love knitting, I just couldn't keep up with them all. This is what mainly inspired me to get back into sewing - I knew this was a faster craft that could turn out some gorgeous blankets! Since April I've been experimenting with different blankets and love the quick yet lovely results.

I started out with the rag edge blanket - I doubted my skills at first and thought this was a safe place to start. They turned out okay and for anyone looking to make a home made gift that has some novice sewing skills, I highly recommend trying this one - very easy and very cozy!!


Then I moved onto a double sided blanket with a zig-szag stitch around the edge.


I even played around with a taggy blanket by special request for a little girl who loves the tags. I should also note that the plain pink fabric on the reverse is leftovers from some pants my mom made me in the early '80s!


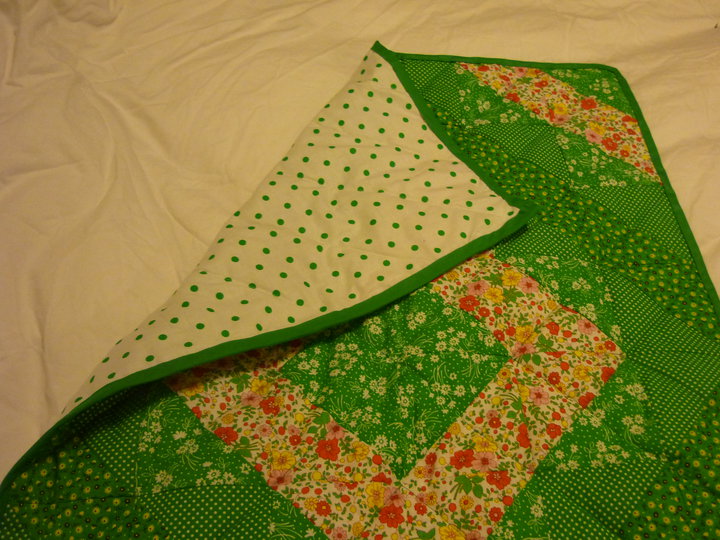
My latest learning has been with the silky blanket binding. As a little girl, this was my favourite part of the blanket so I am pretty excited to have figured it out - I think it makes a polished and professional looking product.


Those are my adventures in learning to make some baby blankets - so much fun for me to play with coordinator fabrics as I learn. :)

Garter Stitch Butterfly Square


As promised in my post about Lily's Blanket:

Butterfly on Garter Stitch
CO 39 Stitches

Row 1-11 - knit

Row 12 - K13, P3, K7, P3, K13
Knit all odd rows
Row 14 - K12, P5, K5, P5, K12
Row 16 - K12, P6, K3,P6, K12
Row 18 - K12, P6, K3, P6, K12
Row 20 - K12, P7, K1, P7, K12
Row 22 - K13, P13, K13
Row 24 - K12, P15, K12
Row 26 - K10, P19, K10
Row 28, K9, P21, K9
Row 30 - K8, P23, K8
Row 32 - K8, P23, K8,
Row 34 - K7, P25, K7
Row 36 - K7, P10, K1, P3, K1, P10, K7
Row 38 - K7, P9, K2, P1, K1, P1, K2, P9, K7
Row 40 - K7, P8, K2, P1, K3, P1, K2, P8, K7
Row 42 - K7, P6, K3, P1, K5, P1, K3, P6, K7
Row 44 - K7, P5, K3, P1, K7, P1, K3, P5, K7
Row 46 - K8, P2, K4, P1, K9, P1, K4, P2, K8
Row 48 - K13, P1, K11, P1, K13
Row 50 - K13, P1, K11, P1, K13

Rows 51-60 - knit
Cast off

Friday, October 29, 2010

Lily's Blanket

I came up with the idea for this blanket while driving home from work one day - and once I had the thought, I knew I had to make it happen!

I knew I could use this pattern for the letters but then I had to invent my own butterfly pattern that would match the size - it took a few tries but I got it right in the end. I'll do a separate post with that pattern.


 I used Bernat Satin Yarn and size 4.5mm needles. Once all the squares were put together I decided to crochet the border using two strands of the pink yarn held together. This made a nice think edging and brought all the colours together.

This blanket traveled a fair bit before it was done - I started knitting it on a weekend near Parry Sound, ON and it went with me on a work trip to Austin & Dallas, TX.

I love the finished product, and wee Lily seems to be enjoying it too - yes that is her in the photo below, not a doll!!

Sunday, October 24, 2010

My First (mini) Quilt

This spring when I started sewing again, I was a bit obsessed. I wanted to sew everyone presents - I would wake up at 7am on a Saturday and want to sew right away - it was a bit over the top really but is how I get when I am excited about my crafts. At the same time this was happening, my mom was doing some major cleaning/sorting of items that had been in the basement since we moved into that house in 1996. Knowing how excited I was about my crafts, she generously gave me a big container full of fabric she'd had since I was a small child (or before I was born!). In the container I found a package of 48 fabric squares in awesome green/yellow/orange - the price tag said $1.99 on the package. My mom says she remembers buying it in about 1975 at Woolworths! I was inspired to use these pre-cut squares and try out my first (mini) quilt! So here is how it went:

I forgot to take a photo of just the squares but first I sewed them together and made them all into triangles. I did this a bit impulsively and didn't really know the pattern would work out so well but once I started to place them I was pleased with the pattern I had unintentionally invented.


Once I had the squares sewn together I put the rows together.


Then assembled the whole thing. The top was done!


I purchased the fabric for the back and luckily since the quilt was so small, I was able to tape the backing fabric to our coffee table so it would be pulled tightly. I lay the batting down, then the top - and pinned it all together. I was worried about it bunching and so I used tons of safety pins.


I used a machine to quilt it all together, and I followed a bit of a starburst pattern from the middle of the quilt out to the edges. None of these photos captures that part particularly well but it was just straight lines.


 Lastly I had to figure out the edging - I bought green bias tape as I have never made it before and learned how easy this was to use. I used a machine to sew it onto the front, and then did the back by hand.

Ta-da! It's complete. I have no idea what I'll do with this little quilt but I can't bring myself to give it away. I am too proud of teaching myself to do this and want to keep it so I'll always remember my first quilt.

Thursday, October 21, 2010

Dave's Scarf


My fiance, Dave, likes to wear a hat - he keeps his hair short and when the weather gets cool, he does not leave the house without one. Last fall, he found this  pattern and asked me to make it for him. It took 3 tries to get the sizing right, but since it's been finished it is his favourite. It's a merino blend and toasty warm! I was especially proud of myself as it was my first attempt at cables - and they were so much easier than I thought they would be.

So of course once the hat was done, the conversation started about a matching scarf. I found this Patons pattern that seemed great. I think I started it in January or February sometime but it was slow going. Although not a very complicated pattern, all the knit/purl switching around plus the cable and having to count rows made it take longer than most projects and to be honest, I got bored with it. The warm weather came and I put it aside to work on a baby blanket (which I really need to write about!). So I picked it back up in September and have finally finished it - in time for Dave to wear it for the cold weather. I am so pleased that it is done!


Friday, October 15, 2010

Easy No-Sew Fleece Blanket

Today was a great day - a regular work day but it involved some crafts!! October is United Way month and the department I work for has a goal to raise a lot of money. One of the ways of doing this is raffling off some gift baskets. Everyone was asked what they might contribute, and the idea is that it will mostly be homemade contributions of some sort. Last year I knit some dishcloths and this year I volunteered to make a cozy fleece blanket.

As I was working on it today I realized it is such an easy craft I should make a short tutorial. With the holiday season upon us, perhaps this is an idea for a gift you can try out.

All credit for knowing how to do this goes to my dear friend Adam - he gave me one of these for Christmas in 2004 (I think?) and it has been a favourite ever since and contributed to many warm winter naps!

Here goes:

Supplies:
2 pieces of fleece - as big as you want the blanket to be
(I actually used two fleece throw blankets for this project - it was cheaper!)
Scissors

How to:
1. Lay out your 2 pieces of fleece so they are matched up with each other. Right sides out.

2. Start to cut slits in both pieces, about one inch wide and 2 inches long. Go all the way around the blanket.  
3. Tie these slits together - one from each piece of fleece. Two knots will do the trick. The fleece will start to gather together a bit, keep on going all the way around.


Note: because I used 2 pre-made fleece throws there was an embroidered edge around them that looked strange, so we just cut it off.

4. Ta da! You have a super cozy, double layer fleece blanket. 

A big thank you goes out to Victoria for helping me out :) Here's hoping it goes to a happy home in the raffle! 

Wednesday, October 13, 2010

Cute Baby Hat

One of my very best friends, Amy, just had her second baby - a perfect little girl named Kyra Ann born on September 27. I was looking for something unique and cute to whip up for this sweet baby girl and when I came across this pattern I could not resist. I knew the hat would be simple and the addition of the flower would be a good challenge for me to try out something new!


I took the hat to Kyra this morning (and got to have such a lovely cuddle with her!) and although I made the "preemie/small newborn" size, she will still need to grow into it. I can't wait to see the cutie in it!

The flower is made from an I-cord - which I had never tried before. Very simple to do, yet adds such a nice addition to the hat. Although the thought of knitting in the round with 4 needles is not always my favourite, I really do love the product in the end.

Now I need to figure out how to modify the pattern for my four year old niece who has requested a pink hat with light purple flower.


Tuesday, October 12, 2010

A collage of crafts

It would take too long to update you on all my past crafts so I am going to move forward ...but thought a photo collage of the things I've made over the past 6 months would be fun to share!

Heidi's Hobby

I'm not sure where the craftyness came from ....but it started slow with a bit of knitting and has now become a full on addiction with mostly knitting but has grown to include some very novice sewing projects over the past 6 months. I've always got a project on the go and so I thought it was about time I starting blogging - to share my creations with friends and family but also to help me keep track of what I do and learn from my lessons.

My fiance says people like to make things with their hands because having a tangible product is very rewarding and I couldn't agree more. When I finish a new knitting pattern, the sense of accomplishment is so huge, and I think about it for days with a huge grin across my face - and if you know me, you've probably heard me share with excitement when I've finished a new pattern. Or, as some family knows, I'll likely show up to Thanksgiving dinner with a finished project, eager to show off what I've made!

I've been trying to think about where this all started...I learned to knit from my grandma when I was a kid - actually I think both of my grandmothers tried to teach me at some time - but was not hugely interested in it. In grade 3 my class did a project where each student knit a square and we made a blanket. I still wasn't hooked. Then, in 4th year university I was on a shopping adventure at Lens Mill store in Guelph and they had a scarf on display that I needed. So I bought the supplies and started knitting with the basic skills I could remember and taught myself the rest from the internet. Knitting for me is therapeutic, relaxing and has resulted in many loved filled gifts. Sewing has evolved over the past little bit, and is totally novice but I am a sucker for the quicker results it gets me as compared to knitting.

I love crafting...I love the creative outlet it provides....I love dreaming up the next gift I can make someone....and most of all I love watching myself learn. So I hope you'll enjoy joining me in this adventure and I look forward to your thoughts and feedback on my projects.