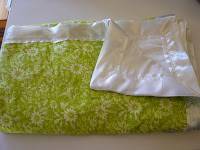
I was excited to learn how to put the silk binding on a baby blanket as I really love the look of it. Through some trial and error I have finally figured it out and am pretty pleased with the product. So I thought I'd share my step-by-step method. While I had found some how-to stuff online - I might have appreciated some more details. Hopefully this will help someone else out.
1. Sew your two places of flannel or whatever fabric you've chosen together. I typically use a yard each of coordinating flannels. Be sure to iron them first.

2. Somewhere I read about doing a zig-zag stitch in addition to the straight stitch to put the two together. I am not sure what this is about but I do believe it makes things a bit sturdier.
3. I did not photograph this part, but iron your blanket binding - it will take a few moments but you'll be happy you did.
4. Make sure you have a thread colour that matches your binding. I made the mistake of trying to use a contrasting colour and instead it just showed all my mistakes. I ripped it out and had to buy new binding to do it again.
5. This part took me a bit to figure out and it may not be perfected yet. Start sewing the binding on close to the corner. You will use a zig zag stitch to sew the binding on. Most bindings have one side that is longer than the other (I have noticed that some I've bought do not have as noticable a difference). If you notice that one side is longer - put it at the back. That way it will always catch the stitch as long as you stay straight on the front.
6. Then I folded it to start the other edge.
8. Sew along the edge, all the way to the end.
9. Fold your corner like this (below). Then pin all the way down the side like in step 7 and sew like in step 8. Repeat until each side is sewn on.
10. Go back to your corner and zig-zag stitch to hold it all together. This may be an unnecessary step but I was imagining little fingers getting stuck in the folds otherwise. I kind of like how it looks.
11. Finishing the final corner is probably the trickiest part, and I've only done it once so far as I had a different method for the first few blankets I did. This was hard to photograph and so may be harder to explain but basically you want to trim the binding and fold it appropriately to try and make it match the other corners. Using an iron to make the folds stay better before pinning and sewing really does help.
And there you go - you have a completed blanket!! Here are the two I made this weekend:
If I've missed anything or you have any questions - let me know!


Great tutorial! Thank you for sharing it - I'm hoping the baby blanket I'm about to start will go a bit smoother than the last one with your instructions!
ReplyDelete